
Before you create a Workplace by Facebook asset, an admin must configure the widget.
Create a Workplace by Facebook asset
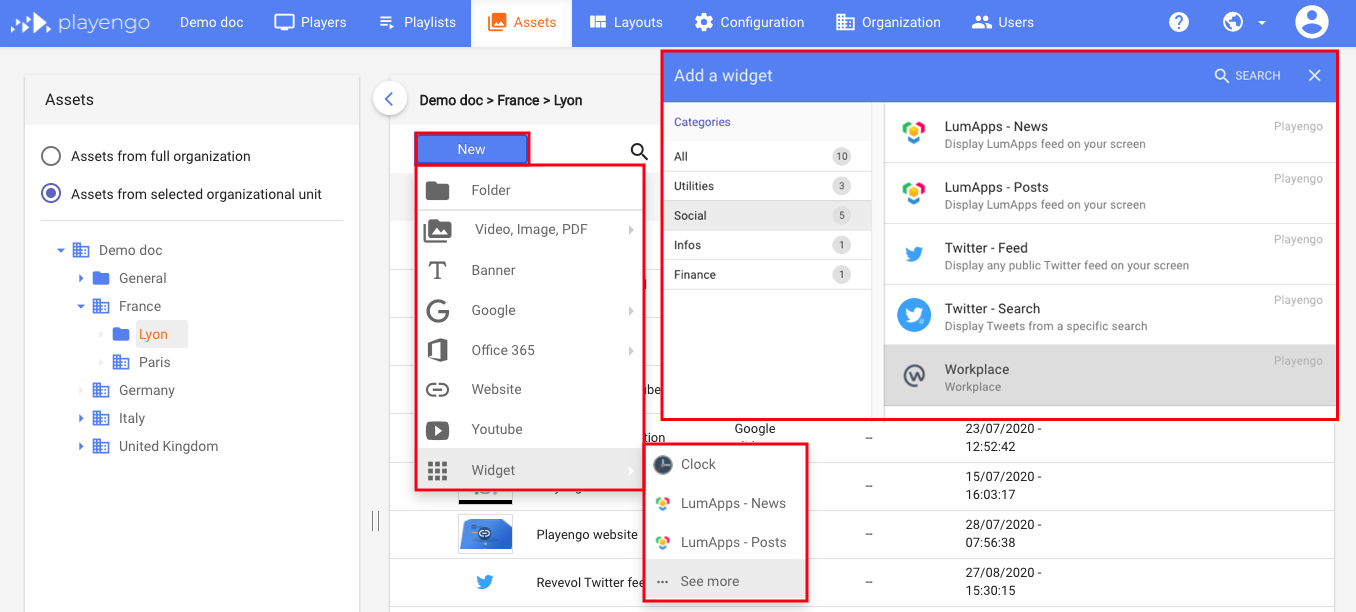
1. Open the Assets tab and select the required folder in the left panel.
2. Click New and select Widget > See more in the menu.
3. In the Add a widget dialog, scroll down, select Social or do a search. Select the Workplace widget.
If an administrator hasn't yet configured the Workplace widget, a warning message is displayed.

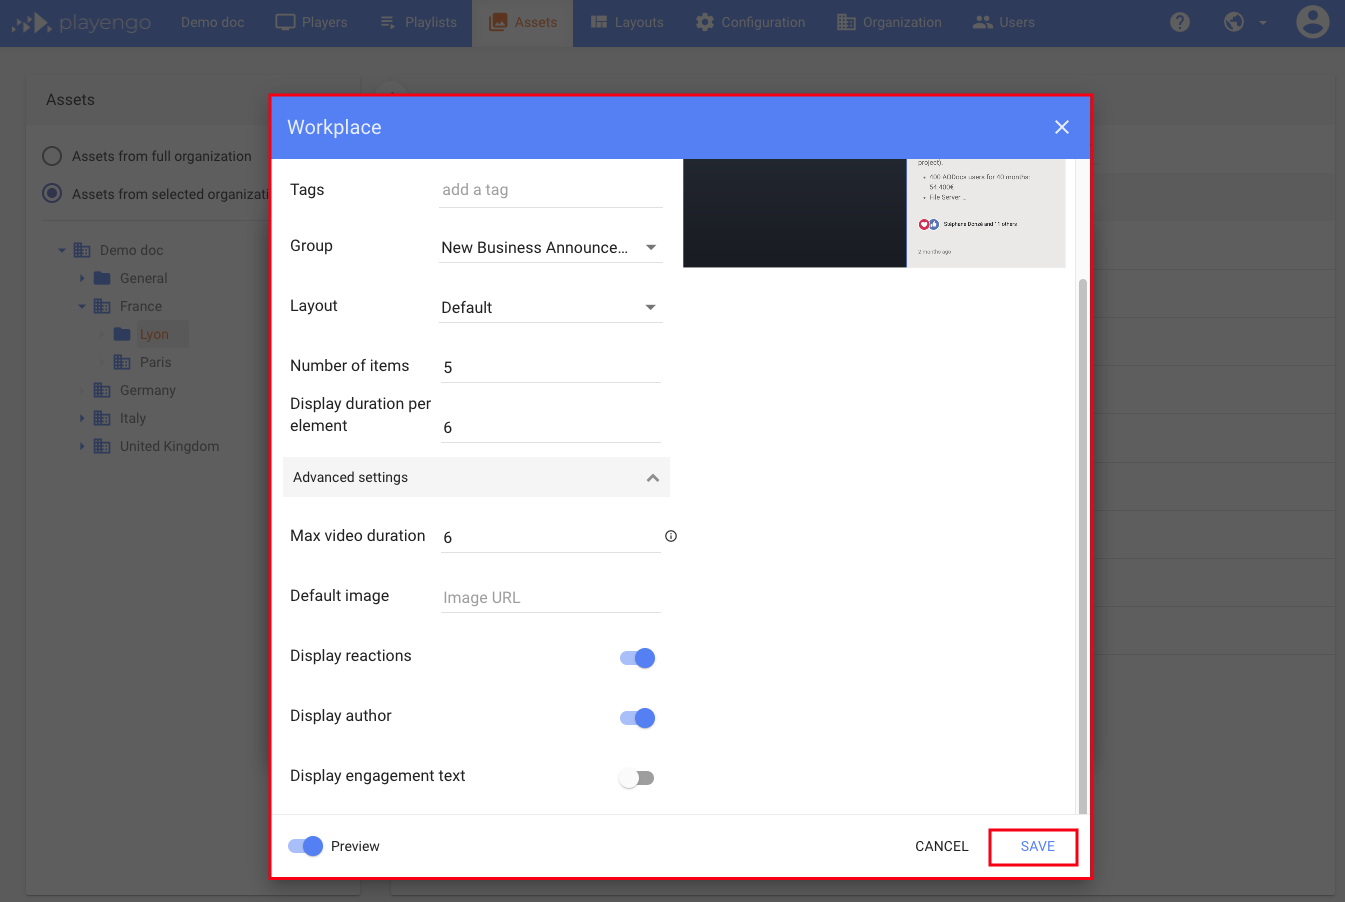
4. In the Workplace dialog:
- give your Workplace widget a name
- if required, add a tag
- select the Workplace group you would like to display
Note: If your Workplace group isn't displayed, ask your administrator to add it to the token.
- choose the type of layout
- choose the number of Workplace items you want to show and the duration of the display

5. In the advanced settings, you can:
- choose a default image – this is used for posts that don't have images
- exclude reactions to posts (recommended)
- choose whether to display the author's name and avatar
- select Display engagement text to display the following text at the bottom of the posts:
Your post here?
Display your Workplace post on this screen by posting into the group [Workplace group name]
6. Click Save.
Configure the widget: for administrators
As an administrator:
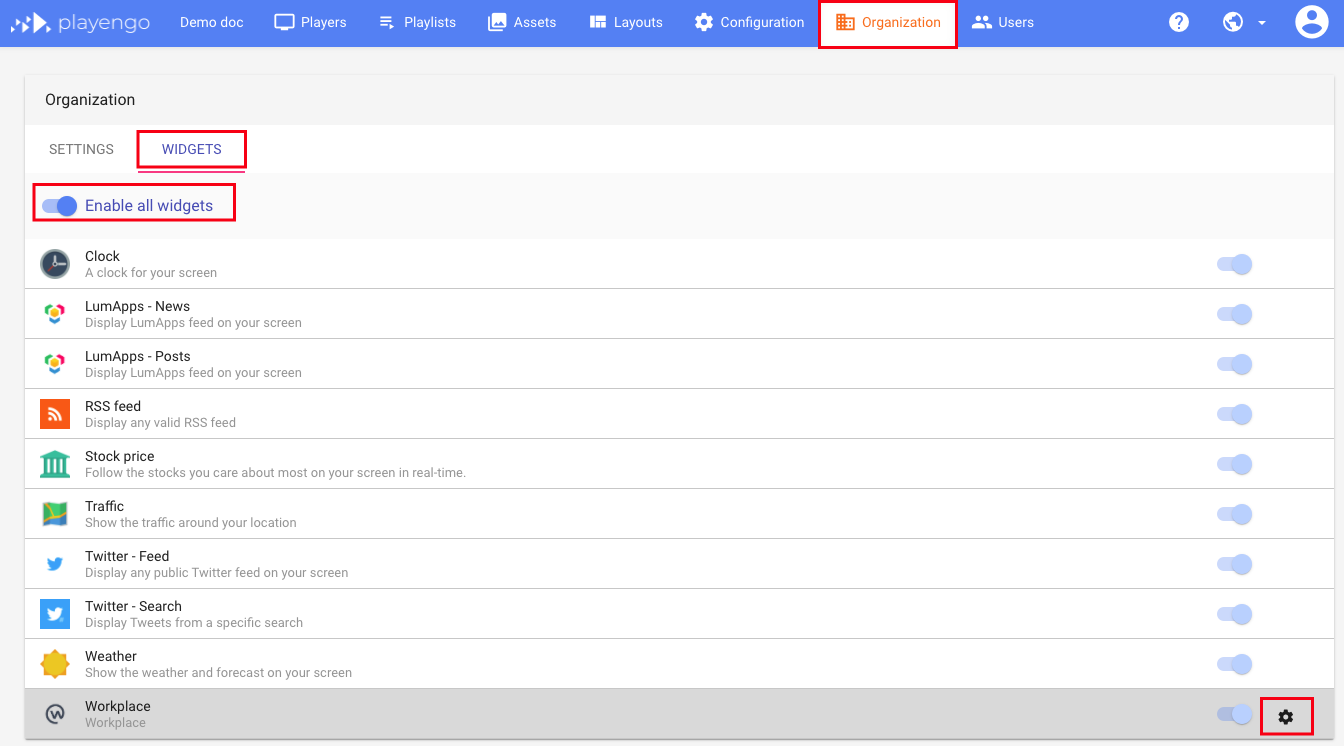
1. Select the the Organization tab, then the Widgets tab.
2. Make sure the Enable all widgets switch is active.
3. Open the settings for the Workplace widget.
 4. Follow the instructions in the Configure Workplace dialog to activate the widget. You can watch the video or scroll down to view the text instructions.
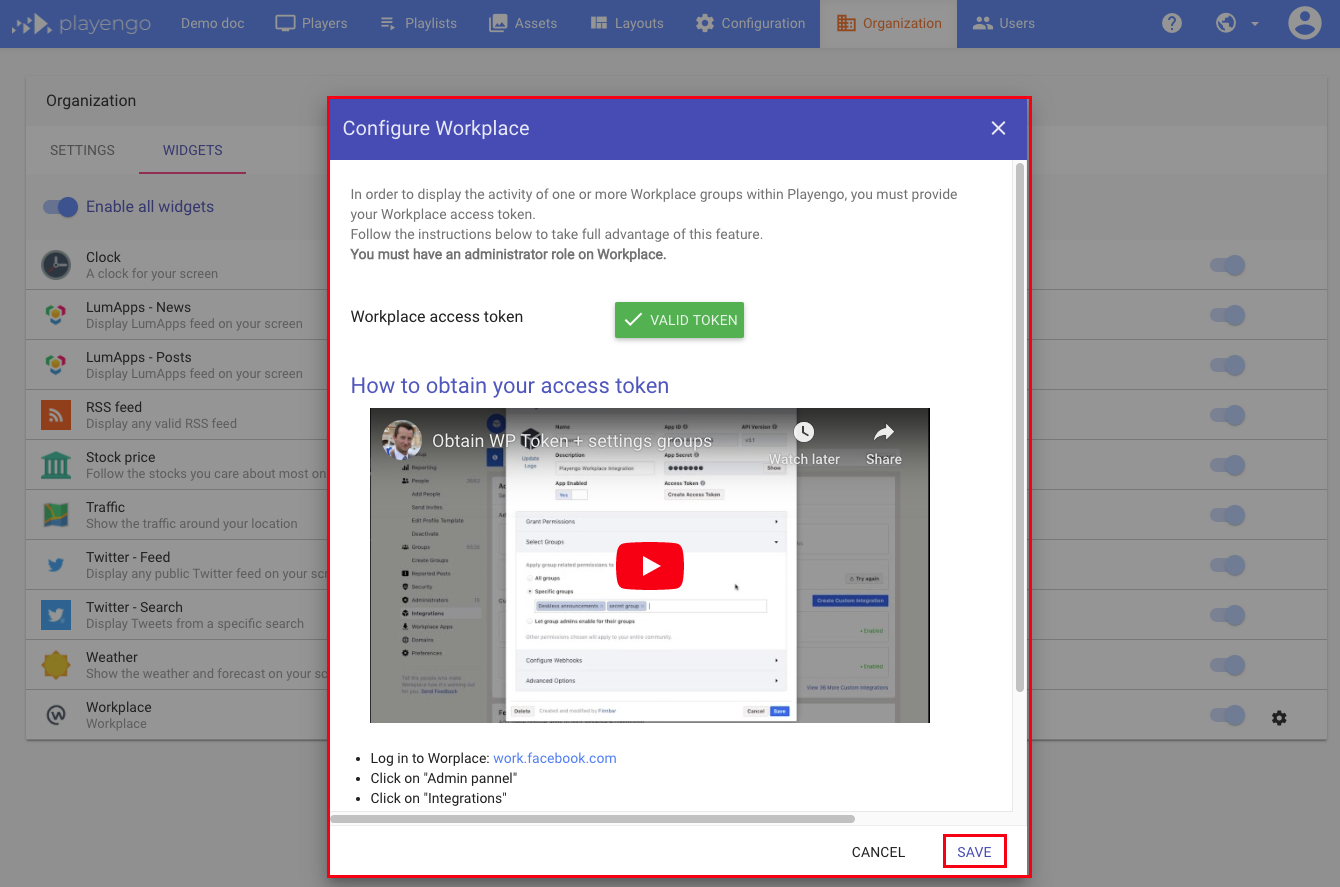
Once a valid token is created, users can create an asset with the Workplace widget.
Comments
0 comments
Please sign in to leave a comment.